How to make your own Ginger Beer at home
Here's a recent kitchen experiment which I am very excited to share!
I have been hankering after ginger because winter=cold and ginger=heat/warmth. Meanwhile, I've also been wanting to incorporate more fermented goodies into my daily life for better gut health. Ginger beer checks both of these boxes (:
Ginger beer is a delicious naturally-fermented beverage made with these basic ingredients:
- fresh ginger
- sugar
- lemon juice
- yeast
In the case of this homemade ginger beer, our source of yeast comes from something called the "Ginger Bug".
Ginger Bug + Ginger Liquid + Time = Ginger Beer.
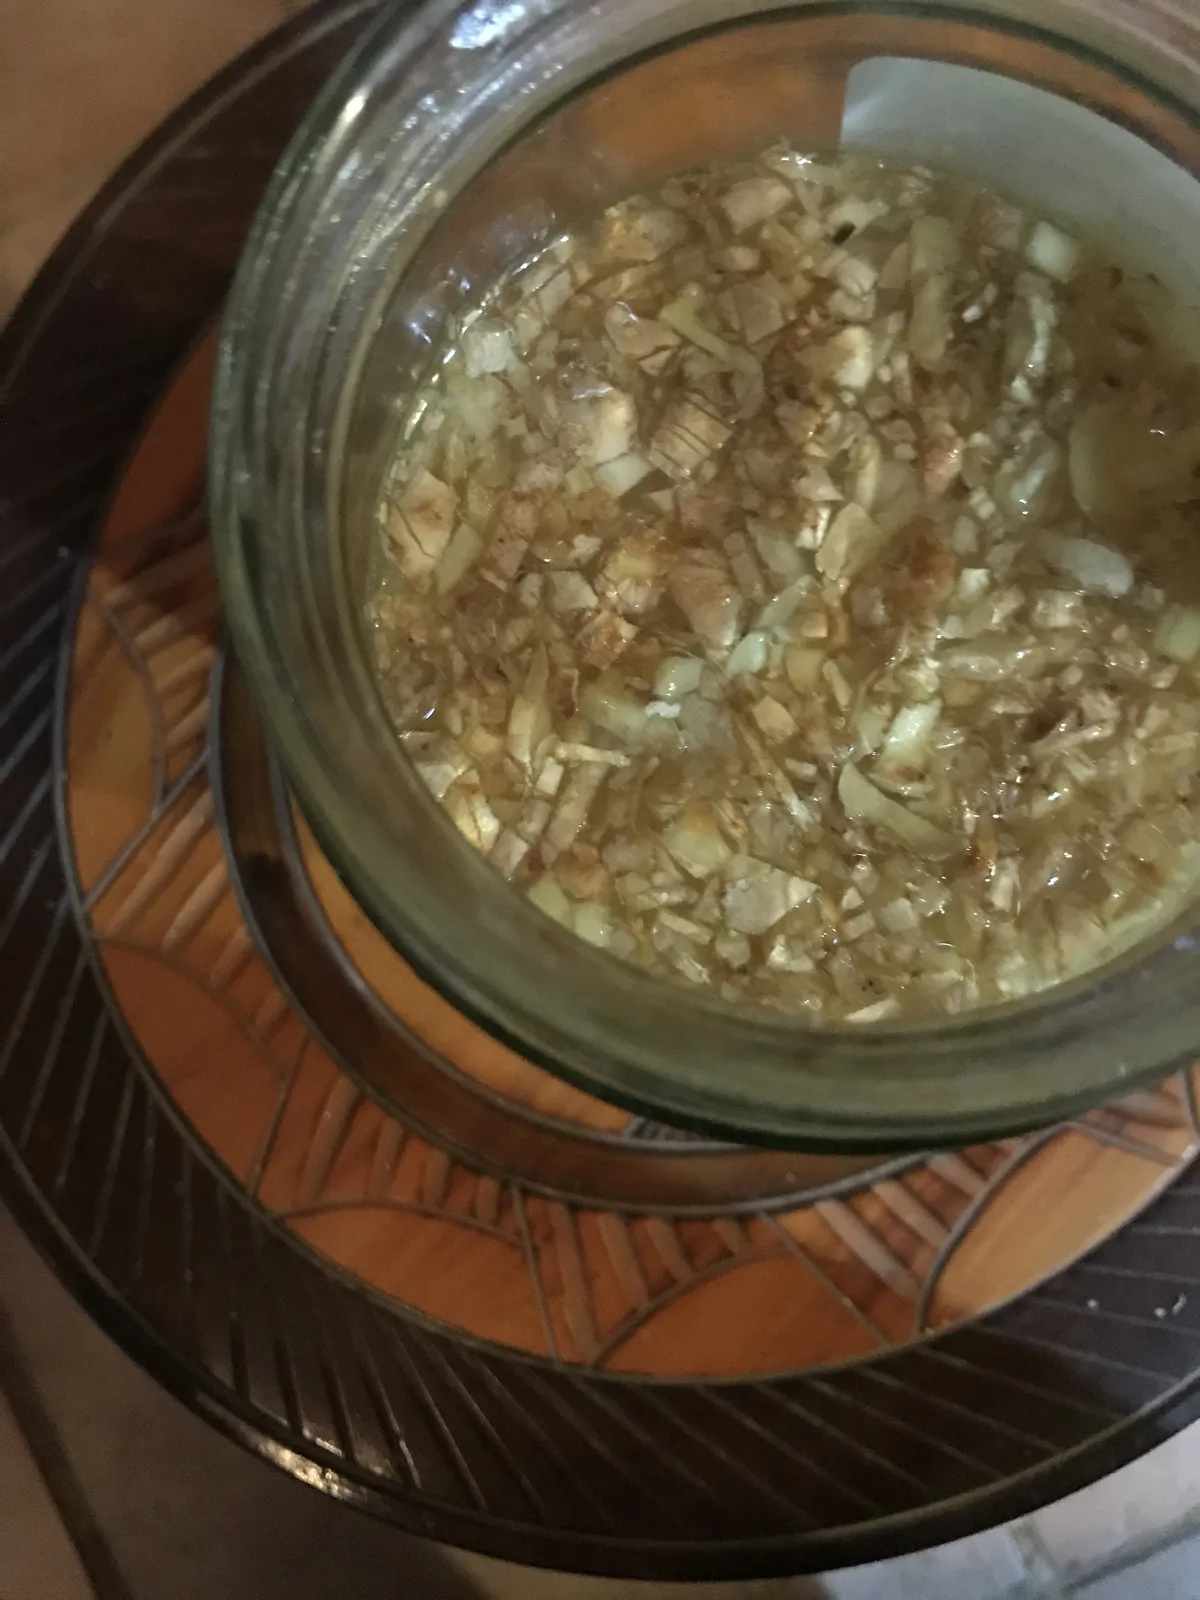
[1] ‘Ginger Bug’
You can think of Ginger Bug as a "starter" of sorts. This is mine pictured above (: If you are a baker of sourdough breads, this is likely familiar territory. For the rest of us, this Ginger Bug starter is a concoction of the same few ingredients mentioned above: fresh ginger, sugar, and water. Here we are recruiting the naturally occurring wild yeast present on the ginger, feeding it sugar, and coaxing it to work with/for us. Once the ginger bug is active and potent, it can be added to our ginger/sugar/lemon juice mixture for fermentation into ginger beer.
Ingredients for the Bug (this is how you start it on Day 1):
- 2 cups filtered water
- 2 Tbsp finely chopped or grated organic ginger (skin on is fine)
- 2 Tbsp granulated sugar
Get the Bug going:
- To cultivate your own wild yeast, combine filtered water with granulated sugar, finely chopped ginger and place these in a glass/plastic container. Mix together until the sugar is dissolved, and cover with a cheesecloth or any breathable fabric. Let it sit for 24 hours.
- Add 1-2 Tbsp ginger and 1-2 Tbsp granulated sugar (1:1 ratio) every 24 hours until the bug becomes fizzy.
Notes for the Bug:
- Ginger: ginger in North America tends to be irradiated or so I've heard and that means any naturally occurring yeast would have been destroyed. To circumvent this, use organic ginger to start your ginger bug and for all subsequent feedings. (You can use organic or non-organic ginger for the ginger liquid)
- Feeding the bug: this is what worked for me — add 2 tbsp sugar + 2 tbsp (organic) ginger for the first 3-4 days. Subsequently 1 tbsp of ginger and sugar.
Simply smell or taste the bug each day. If it's still sweet, maybe you could skip a day of feeding. Give the yeast time to work on the sugar. Stirring once or twice a day helps. When it's all bubbly and yeasty smelling, you know it's ready for use. For me, this happened on Day 7.
Every bit of information you find online can seem highly anecdotal, even mine, because every ginger bug is different and that to me is the wonderfulness of fermentation! Experiment, observe (look, listen, smell, feel), get to know your bug (:
Once your Ginger Bug is ready to be used, you can get to work on your Ginger Liquid.
[2] Ginger liquid
(this is the substrate you want to ferment into your Ginger Beer)
Ingredients for Ginger liquid:
- 2 quarts (or 8 cups) filtered water
- 170g granulated sugar see notes
- 1/4 cup (54g) ginger, grated
- 1/2 cup strained ginger bug liquid
- optional Juice of 2-3 lemons
Instructions:
- In a large pot, bring 2 quartz of water to boil. To that, add sugar and grated ginger. When the mixture comes to a rolling boil, reduce the heat and let it simmer gently for 5-8 minutes. Remove the mixture from the heat and let it cool down until it reaches room temperature,
- When the mixture is at room temperature, strain it through a fine mesh colander.
- Next, add in ½ cup of your strained [1]Ginger Bug and the juice of 2-3 lemons.
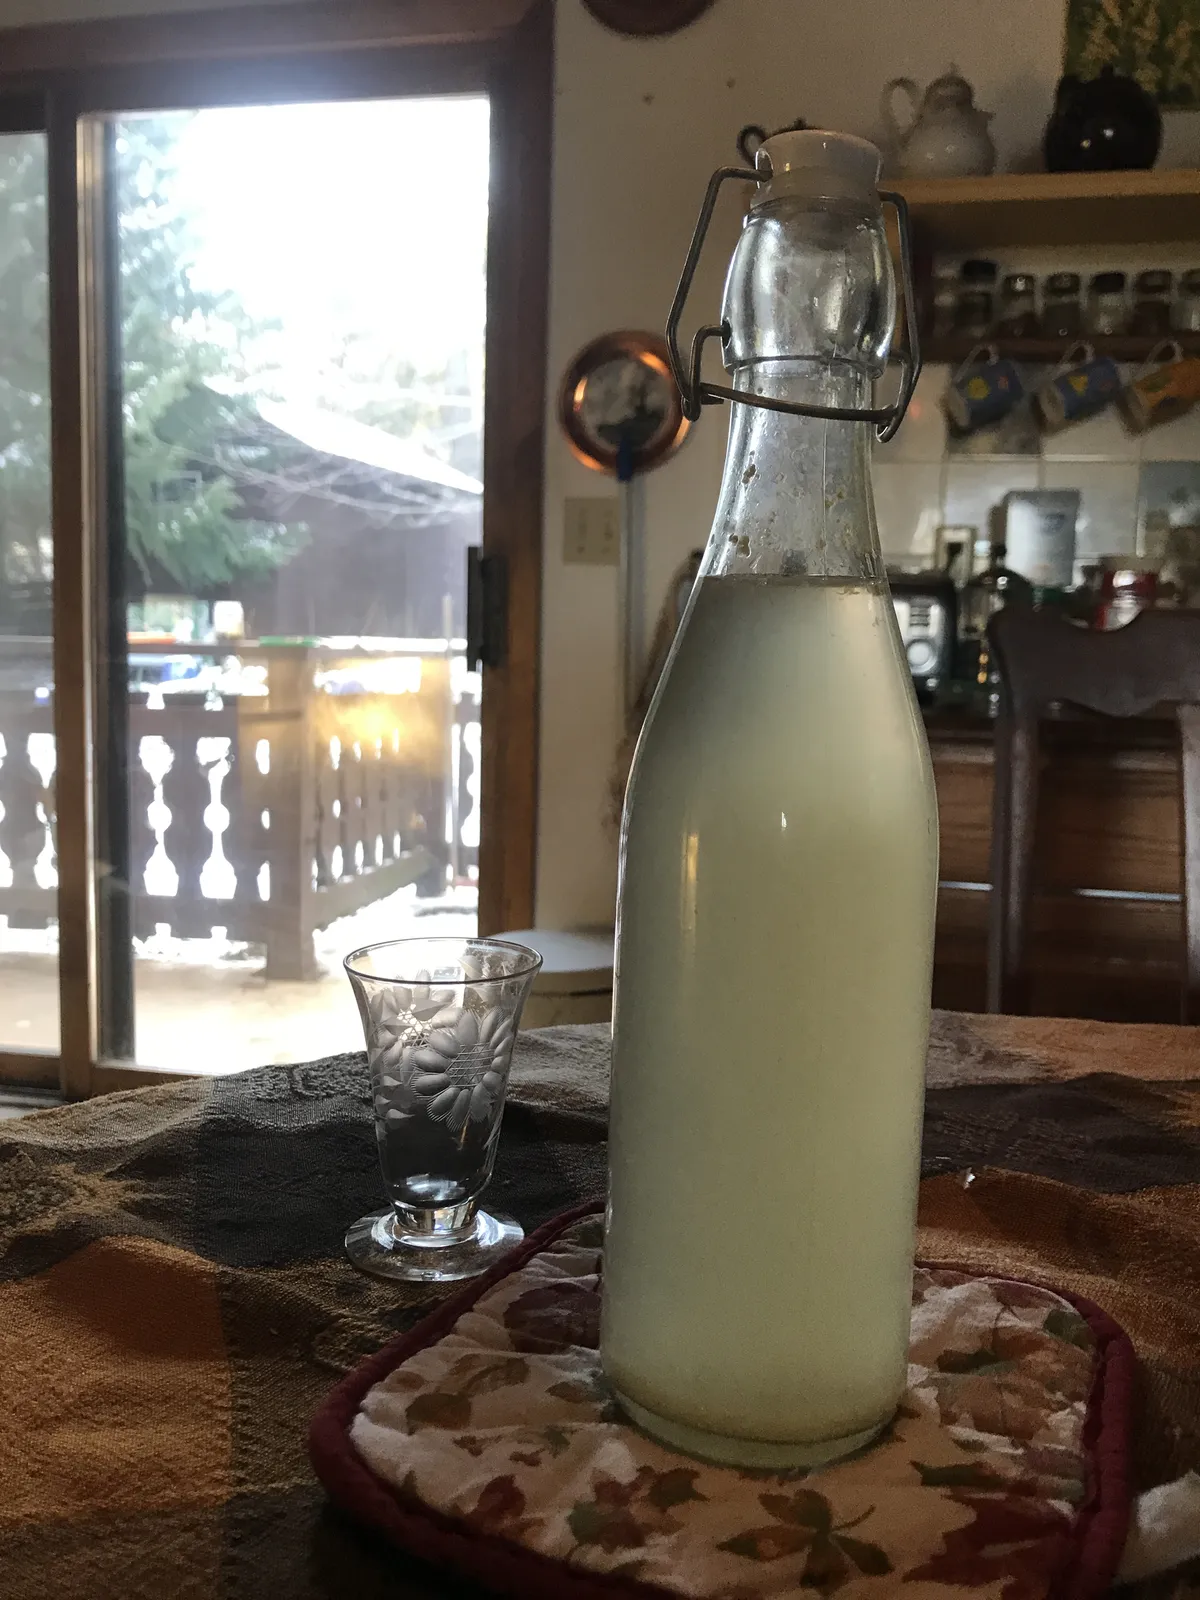
- Stir well and transfer that mixture to your bottles (see Notes). Make sure to leave at least 2 inches of head room. Let the bottles sit at room temperature. Here we wait it out.
- Burp bottles once a day (be careful!).
- Do a taste test. If it's fizzy enough and you like how it tastes, congratulations! Pop the bottles into the refrigerator. Consume liberally (:
Notes:
- Ginger: ginger in North America tends to be irradiated or so I've heard and that means any naturally occurring yeast would have been destroyed. To circumvent this, use organic ginger to start your ginger bug and for all subsequent feedings. (You can use organic or non-organic ginger for the ginger liquid)
- Sugar: I echo Joshua Weissman's suggestion — you could experiment with more sugar for sure, but probably don't want to go lower than 170g.
- Bottles: Bottling the ginger beer either in plastic bottles or flip top bottles works, although it is much easier to tell with plastic bottles if the pressure is building up too much. Just give it a squeeze. If using flip top bottles, try to have both hands on the top when you release. Burp the bottles outside or in the toilet. Put on some goggles lol. Do whatever you need. Don't want to be long winded here. Just...be super careful!
- Flavours: the above is a basic recipe for ginger beer. You can use your ginger bug to carbonate other mixtures, juices as well. Experiment, go wild.
- Alcohol: the ginger beer will continue to ferment while in the fridge, although much more slowly, and will become alcoholic with time. For me that took about 10-14 days in the fridge.
Oh hey, this ginger bug that I still have... what do I do with it now? If you're not ready to brew another batch of ginger beer just yet, we'll go into maintenance phase.
- Top up the water in the ginger bug (1/2 cup because that's what we removed and added to the ginger beer), put a lid on the jar, and pop it into the fridge.
- Feed your ginger bug once a week with 1tbsp sugar, 1tbsp organic ginger.
- When you're ready to brew again, remove the bug from the fridge. Add 1tbsp sugar, 1tbsp organic ginger. Give it a good stir. Cover with cloth once again and let it stand at room temperature for a few hours. Depending on how active your bug is, the time it takes for it to regain activity might vary.
Happy brewing! ❦